|
|
|
 |
Tutorial #1 |  |
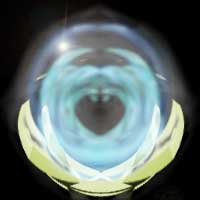
| Crystal Ball This tutorial uses a technique I learned from another tutorial, the Dragonfist. I played with it a few times, and came up with the finished product. |
 |
|
Step Set 1 Step 1: Create a new file using the following settings: 200X200 at 72dpi. Step 2: Using the paint bucket, turn the whole image black Step 3: Make a small empty eliptical(the circular one) marquee (thats the selection tool) Step 4: Filter/Stylize/Extrude Settings: Size 20 Depth 255 Step 5: Cntrl+I (to invert the colors) Step 6: Cntrl+U (to make it purty colors, click the "Colorize" button) Step 7: Filter/Distort/Polar Coordinates --- Rectangular to Polar Step 8: Filter/Artistic/Plastic Wrap ---- Default Settings Step 9: Cntrl+I (to invert again) Step 10: Filter/Distort/Twirl ----200 (or to your liking) Step 11: Duplicate Layer Step 12: Edit/Transform/Flip Horizontal Step 13: Turn the duplicated layer's blending mode to "Lighten" (that's on the layers pallet, normally it says "Normal". That's a drop down menu.) Step 14: Merge the two layers. Step 15: Repeat steps 1 - 14 two to three times (seperate files) altering the altering the size of the eliptical marquee and color from Step 6. To Make The Dragon into a ball..... Step 16: Individually chose which of the pretties you wish to make appear as the crystal ball itself, and which single one to make appear as the base. Step 17: On the pretties you made the ball, Filter/Blur/Blur, then Cntrl+F until you like the blur level. Step 18: For the Ball layers begin pulling them onto one, using the base layer as the deepest level of the crystal ball. Each additional ball, use the Layers blending list to choose precisely how it will appear. (it's up to taste on that one ;) ) Step 19: With the last layer to be placed being the base, bring it on, making sure it's not blurred. Step 20: Filter/Render/Lens Flare Settings to taste, then... it's done :) Even though it has a lot of steps, It's not as hard as you think :) Contact me Back to the Main Tutorial Page |
|